
How To Measure Pipe Fittings: Professional Guide for Accurate Sizing
How To Measure Pipe Fittings: Professional Guide for Accurate Sizing
Getting accurate measurements for pipe fittings is critical for any plumbing or piping project. Incorrect measurements can cause project delays, material waste, and costly installation errors. This guide provides professional techniques to measure pipe fittings correctly, ensuring proper fit and system performance.
Understanding Pipe Fittings and Their Applications
pipe fittings are essential components that connect pipes together and control flow direction within piping systems. These components allow you to change pipe direction, branch into multiple lines, adjust pipe diameter, and seal pipe ends effectively.
Common types of pipe fittings include elbows (45° and 90°), tees, reducers, caps, couplings, and crosses. Each type serves a specific function in your piping system and requires precise measurement for proper installation.
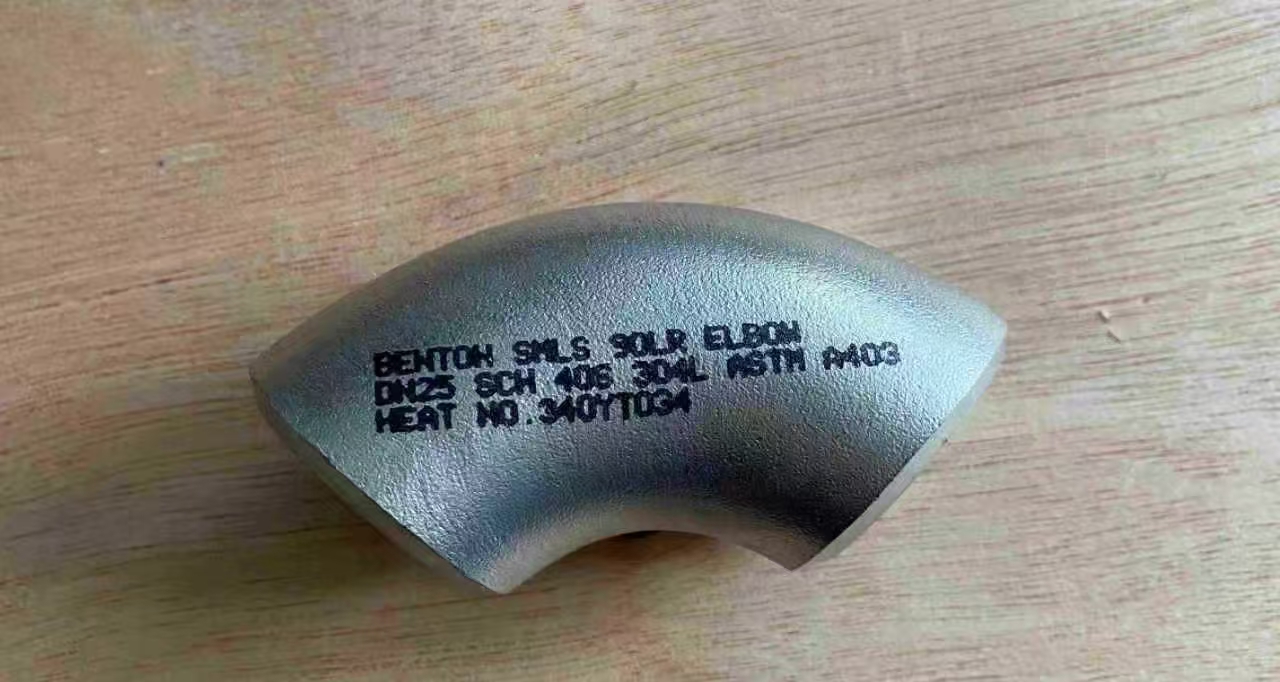
ASTM A403Pipe Fitting
Inside Diameter vs Outside Diameter: Understanding the Difference
Pipes and pipe fittings are primarily measured by their inside diameter (ID), also called nominal diameter or nominal bore (NB). The inside diameter represents the distance from one inner wall to the opposite inner wall, directly affecting flow capacity and system performance.
The outside diameter (OD) measures from one outer edge to the opposite outer edge, including pipe wall thickness. Modern pipe sizing uses standardized naming rather than exact measurements. For example, 1-inch pipe is designated as 25NB (25mm nominal bore) with a standardized outside diameter of 33.7mm, while the inside diameter varies based on wall thickness or schedule rating.
Understanding this distinction is crucial because the inside diameter of pipe fittings determines flow capacity, which directly impacts your system’s efficiency and pressure requirements.
Outside Diameter Measurement Techniques
Preparation and Measurement Steps
Measuring the outside diameter of pipe fittings requires careful preparation and technique:
Step 1: Surface Preparation
Clean the pipe fitting surface thoroughly to remove dirt, rust, or protective coatings. Any contamination can affect measurement accuracy. Ensure the pipe fitting is at room temperature, as thermal expansion affects dimensions.
Step 2: Tool Selection and Positioning
Use digital calipers or pipe diameter tape for best accuracy. Position the caliper jaws around the widest point of the pipe fitting, ensuring the measuring tool is perfectly perpendicular to the fitting axis.
Step 3: Multiple Readings
Take at least three measurements around the pipe fitting circumference at different rotation points. Record all measurements, calculate the average, and check for deviations that might indicate out-of-round conditions or deformation.

Measuring Outside Diameter of ASTM A403 Pipe Fitting
Critical Measurement Errors To Avoid
Common mistakes reduce measurement accuracy: measuring over protective coatings instead of bare metal, using worn or uncalibrated tools, taking only one measurement, or failing to account for pipe fitting deformation. Always measure bare metal and verify tool calibration before critical measurements.
Inside Diameter Measurement Methods
Professional ID Measurement Approaches
Method 1: Inside Calipers
Insert caliper measuring tips into the pipe fitting opening and expand until both tips touch the inner walls. Avoid forcing the caliper, which can scratch the pipe fitting surface or produce false readings. Lock the caliper position before reading the measurement.
Method 2: Bore Gauges
For precision measurements of larger pipe fittings, insert the gauge head into the bore and expand until proper contact is made with the inner surface. Transfer the measurement to a micrometer for accurate reading.
Special Considerations for Reducer Fittings
Reducing pipe fittings have different inside diameters at each end. Measure both ends separately and take measurements at multiple points to detect any taper or irregularities. Always record the minimum ID, as this dimension determines actual flow capacity through the pipe fitting.
Threaded Pipe Fittings: Specialized Measurement Requirements
Threaded pipe fittings require special consideration due to thread configuration. Male threaded pipe fittings have threads on the outside—measure the outside diameter across thread crests and use thread pitch gauges to determine threads per inch (TPI).
Female threaded pipe fittings have internal threads. Measure the inside diameter at the thread base, not including thread depth. For both types, verify thread pitch using proper gauges and measure according to NPT, BSP, or applicable threading standards.
Non-threaded pipe fittings (plain end or butt-weld types) follow standard OD and ID measurement procedures without thread complications.
Measuring Common Pipe Fitting Types
Elbow Pipe Fittings Measurement
Elbow pipe fittings change pipe run direction and require multiple specific measurements. Measure outside diameter at the widest point of each end, inside diameter of the bore at inlet and outlet, center-to-end distance from the centerpoint to each face, and verify the bend angle (45°, 90°, etc.) using an angle finder.
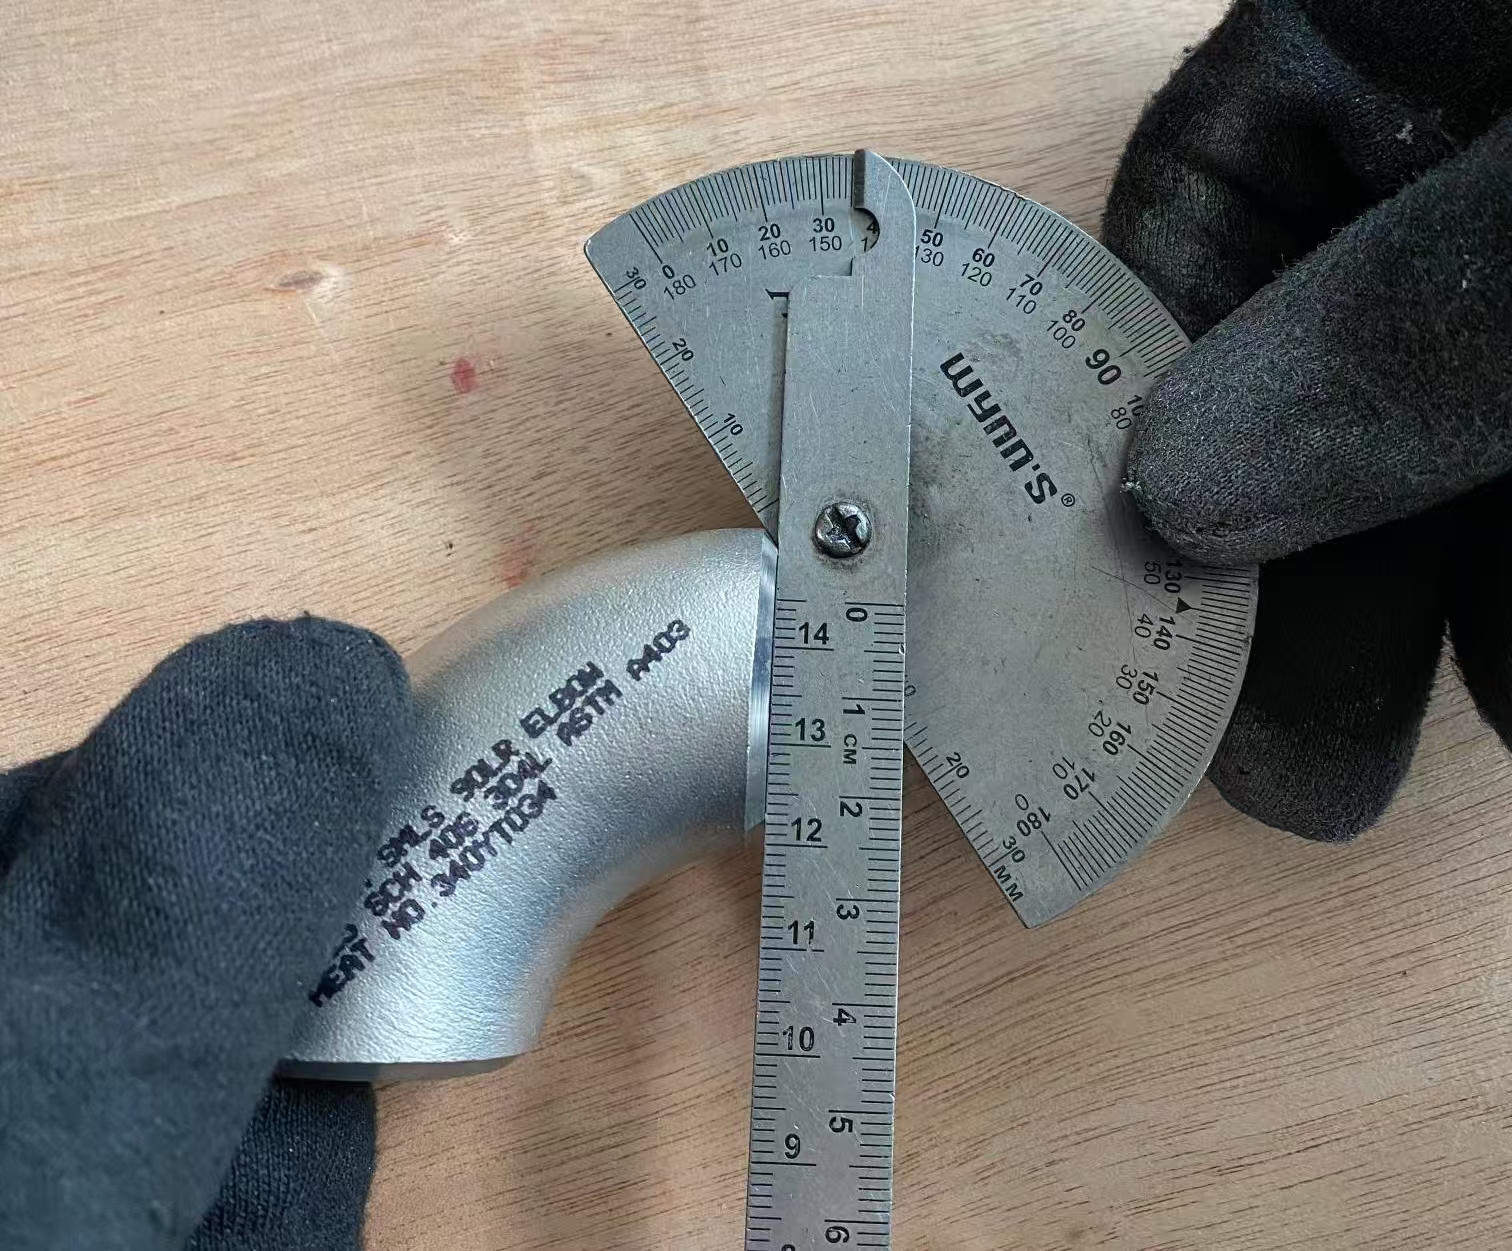
ASTM A403 Pipe Fitting Elbow Angle Measurement
Tee and Reducer Fittings
Tee pipe fittings connect three pipes and require measurements for each of the three openings (both OD and ID), center-to-end dimensions on all branches, and wall thickness at critical junction points.
Reducer pipe fittings connect different pipe sizes. Measure both large end and small end diameters, record the overall reducer length, and document whether the reducer is concentric (centered) or eccentric (offset).
Wall Thickness Measurement Techniques
Wall thickness directly affects pipe fitting strength and pressure ratings. The most accurate method uses ultrasonic thickness gauges—a non-destructive technique requiring couplant gel application and readings at multiple points around the pipe fitting.
Alternatively, calculate wall thickness using calipers: measure outside diameter and inside diameter, then calculate using the formula WT = (OD - ID) ÷ 2. Verify measurements at several locations around the pipe fitting circumference to ensure consistency.
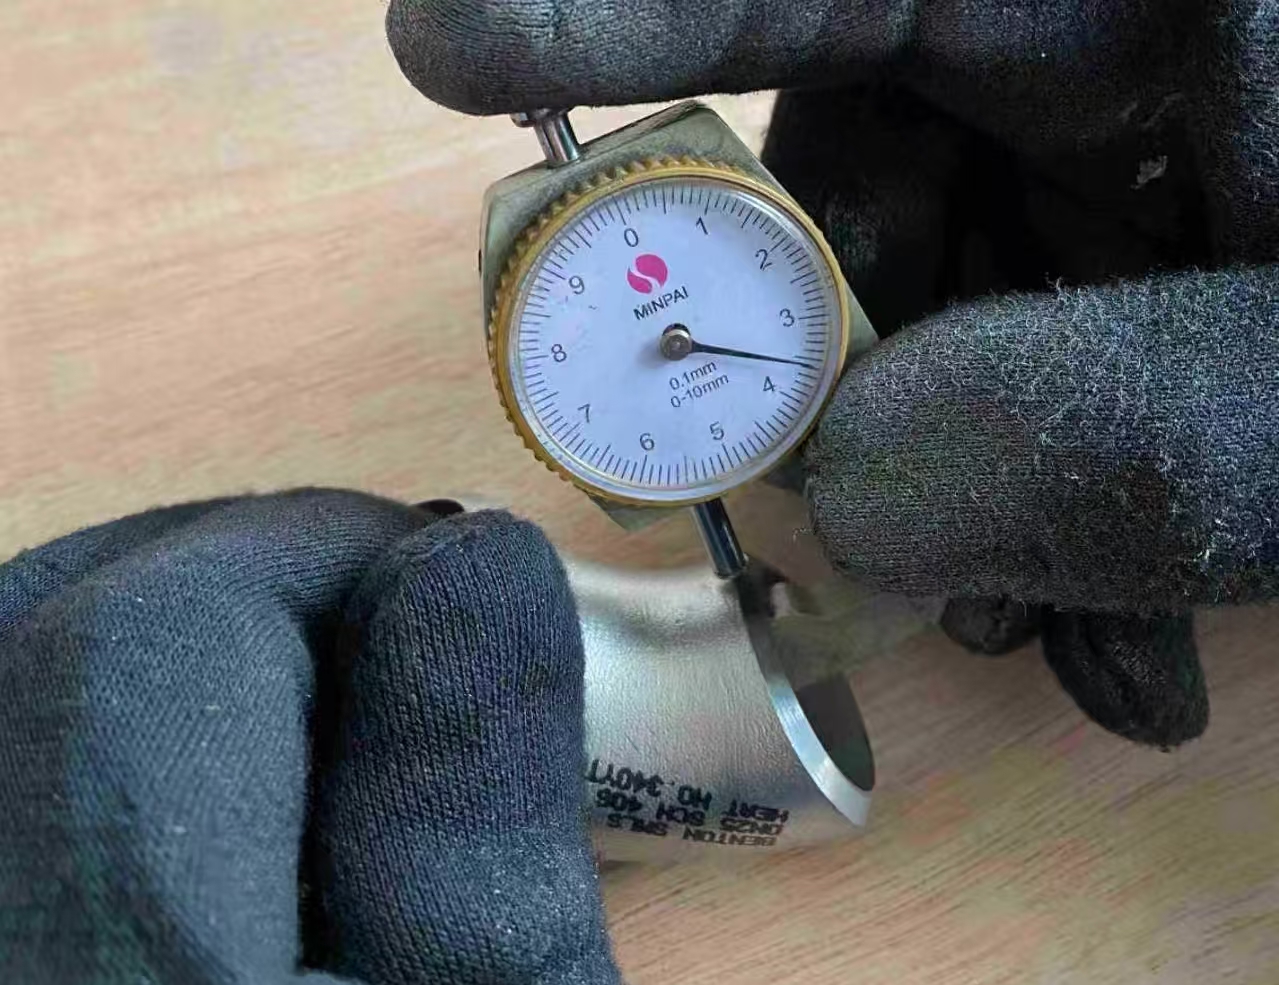
Measuring the thickness of ASTM A403 Pipe Fitting
Essential Measuring Tools and Equipment
Primary Tools for Pipe Fittings Measurement
Digital Calipers (0-150mm or 0-200mm): The most versatile tool for pipe fitting measurement, providing OD, ID, and depth readings. Digital readout eliminates reading errors. Quality options range from $30-$200.
Pipe Diameter Tape: Specifically designed for pipe circumference measurement, automatically converting to diameter. Particularly useful for larger pipe fittings. Cost ranges $15-$50.
Thread Pitch Gauge: Essential for identifying thread type and threads per inch on threaded pipe fittings. Available in metric and imperial versions for $10-$30.
Ultrasonic Thickness Gauge: Professional tool for accurate wall thickness measurement using non-destructive testing. Required for precise schedule identification. Professional models cost $200-$2,000.
Industry Standards for Pipe Fittings Dimensions
Key International Standards
ASME B16.9 is the most common standard for factory-made wrought steel pipe fittings, covering dimensional specifications for elbows, tees, reducers, and caps in sizes from NPS 1/2" to NPS 48".
ASME B16.11 covers forged pipe fittings for socket-weld and threaded applications, primarily for high-pressure systems in smaller sizes (NPS 1/4" to NPS 4").
DIN Standards (2605, 2615, 2616, 2617 series) provide European specifications for pipe fittings using metric sizing. JIS Standards (B2311, B2312, B2313 series) offer Japanese Industrial Standards commonly used in Asian markets.
Measurement Accuracy and Project Success
Accurate pipe fittings measurement delivers immediate benefits: zero installation delays with correctly fitting components, reduced material costs by eliminating reorders, professional leak-free connections throughout the system, and time savings from smooth installation without field modifications.
Long-term benefits include enhanced system reliability with properly sized pipe fittings that last longer and perform better, easier maintenance through accurate documentation, safety assurance meeting pressure and flow requirements, and guaranteed code compliance with proper measurements.
Projects using accurately measured pipe fittings typically experience 30-50% reduction in installation time, 90%+ decrease in fitting-related callbacks, and elimination of costly emergency material orders.
Conclusion: Precision Measurement Best Practices
Accurate measurement of pipe fittings is fundamental for successful piping projects. Master these key techniques: always clean pipe fittings before measuring, take multiple measurements at different points, use appropriate tools for each measurement type, document all measurements clearly for ordering and installation, and verify measurements against applicable standards.
Whether measuring carbon steel pipe fittings, stainless steel pipe fittings, or specialty alloy pipe fittings, these techniques remain consistent. With practice and attention to detail, you’ll minimize errors, reduce costs, and ensure optimal system performance.
For complex projects or large pipe fittings orders, consult experienced suppliers who can verify your measurements and recommend optimal pipe fittings for your specific application requirements.
Global Steel Demand to Recover Moderately in 2026: Which Regions Will Become Procurement Hotspots?
Other Reading









CONTACT US
Subscribe to our newsletter to receive the latest information